Sublimation crafts have taken the crafting world by storm, but if you’re new to this project it can be intimidating. To get your sublimation journey off to the right start, you need the right tools and knowledge. With this guide, you will learn how to pick the right sublimation printer, ink, and paper; as well as how to make sublimation prints of your own design!
There are also a variety of techniques that can be used with sublimation inks which allow for even more creativity and fun. Don’t let beginners overwhelm stop you from crafting beautiful sublimation prints – use this guide and get started today.
Kickstart your artistic endeavors with our guide to sublimation! We’ll show you how to properly set up and use an Epson EcoTank printer, select the best ink and paper, transfer designs onto apparel as well as jewelry – plus provide tips on achieving amazing results. Come explore this world of personalized projects today .
What is Sublimation?
With a simple process of sublimation printing and high heat, you can bring your most ambitious designs to life on almost any surface! From shirts and mugs to pillowcases and wood – the possibilities are truly endless. Let your creativity run wild with this amazing method that puts no limits on what it is capable of bringing into reality.
Sublimation is a great way to create stunning, one-of-a kind designs. But if you’re just getting started on your sublimating journey, Cricut Infusible Ink provides an easy and convenient entry point – pre-printed inks that can be used for all sorts of projects! Just give it a try – who knows? It might start something beautiful.
Unleash your inner artist and create whatever masterpiece you desire! With Cricut Infusible Ink, choose from a range of pre-designed patterns – or step up to the challenge with sublimation printing. Design everything from detailed designs to photo prints for unique home decor projects.
Sublimation printing is the perfect option for high-quality designs that won’t fade, peel, or crack over time. Your projects will stand the test of time – even when your shirt reaches its final days.
Getting Started with Sublimation -What You Need
Are you looking to break into the world of sublimation? Overwhelmed by all that is involved with getting started in this art form? Let us help – check out our Sublimation for Beginners video and take your first steps towards mastery! From understanding what supplies are needed, step-by-step instructions on printing, we have you covered.
If you have questions about getting started with sublimation projects, look no further! Here’s the information needed to get your creative juices flowing and make beautiful works of art.
Sublimation crafting is a breeze – it’s not as intimidating as you’d imagine! If you’re already a Cricut craft enthusiast, sublimating could be the perfect addition to your repertoire. Plus, with just some basic supplies like a heat press and any resources available on hand — starting up can be surprisingly simple for small business owners looking to level-up their creative game.
Sublimation crafting requires no cutting machine or scissors – the designs are transferred directly from prints! It’s an effortless way to customize your project.
Sublimation Printer, Paper, and Ink
To get your sublimation project started, you’ll need a specialized printer that uses special ink. This innovative technique bonds the ink to your desired surface through an intense thermal transformation – no ordinary home-inkjet will do! The details of this remarkable process are just around the corner.
Looking for the best sublimation printer without breaking the bank? Check out an Epson model! These affordable printers provide high-quality prints at a fraction of what more specialized models can cost – even as much as $700+.
Get crafting right away with the hassle-free EcoTank 2760 Printer – no ink cartridges needed! Sublimation printing just got easier; simply fill up your tank and you’re ready to go. With our helpful guide, setting up an Epson EcoTank for sublimation is now a breeze – those projects won’t know what hit them.
Everyday printer ink and dye sublimation ink have a big difference – one will leave an unwelcome residue on your project while the other is specially formulated to help you craft unique prints! Dye sublimation printing uses special inks that vaporize when heated, transferring vibrant colors onto items like t-shirts and mugs.
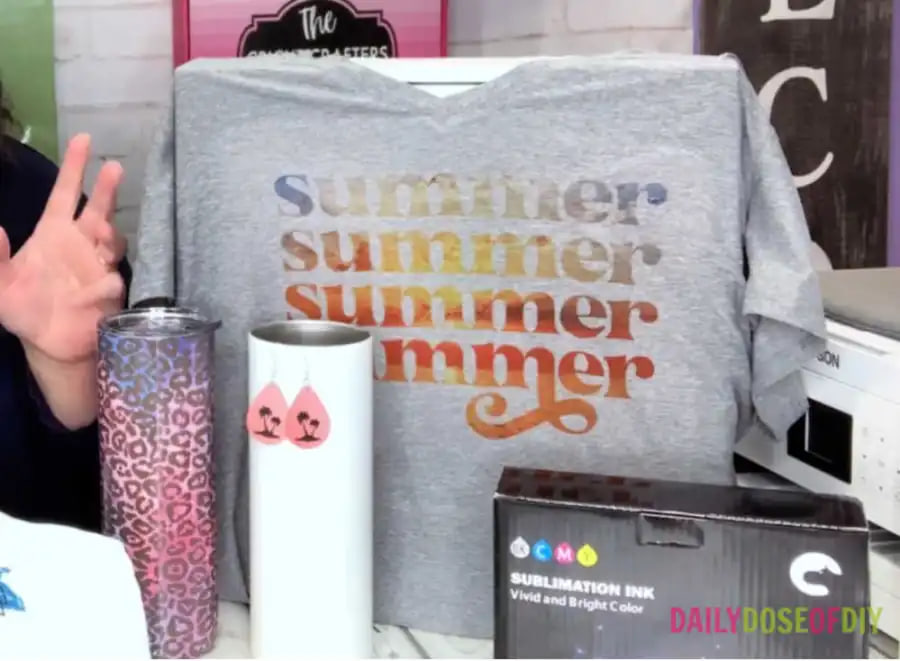
Get the most out of your printing with Hiipoo’s sublimation ink! Experience mess-free, optimized results when paired with Epson printers. Sublimation paper also ensures that you get vivid colours and long lasting prints thanks to its special coating which is heat resistant.
Hiipoo’s sublimation paper stands out from the rest with its unmistakable print side—it has a special watermark that identifies it at first glance! I’ve been thrilled by this time-saving feature, and overall have found Hiipoo to be one of the most reliable suppliers of quality transfer papers.
Other Supplies You’ll Need for Sublimation
Once you’ve got your inkjet printer, sublimation transfers, heat transfer vinyl and screen printing supplies, you’ll need a heat source to finish your project. Depending on what kind of end product you have in mind, Cricut EasyPress 2 is the perfect solution.
An ordinary home iron won’t do the job and while the original Easy Press will produce decent results, it may not get hot enough to give the desired finish. There’s no one-size-fits-all solution when it comes to DIY crafting supplies, so double check whether or not your heat source of choice has enough heat output before starting your project.
If you’re looking for an easy home-solution to personalizing mugs and tumblers, a standard heat press or Cricut mug press can help take your crafting projects up a notch. For those who are feeling really creative? Why not try customizing ceramic pieces in the comfort of your own kitchen – all with just a toaster oven.
What Can You Sublimate On?
Did you know that a plethora of items can be sublimated? Not only do we need specially formulated inks and papers, but specific blanks are necessary to make it work! With the right combination, your everyday objects can become unique works of art.
Shirts and Fabrics
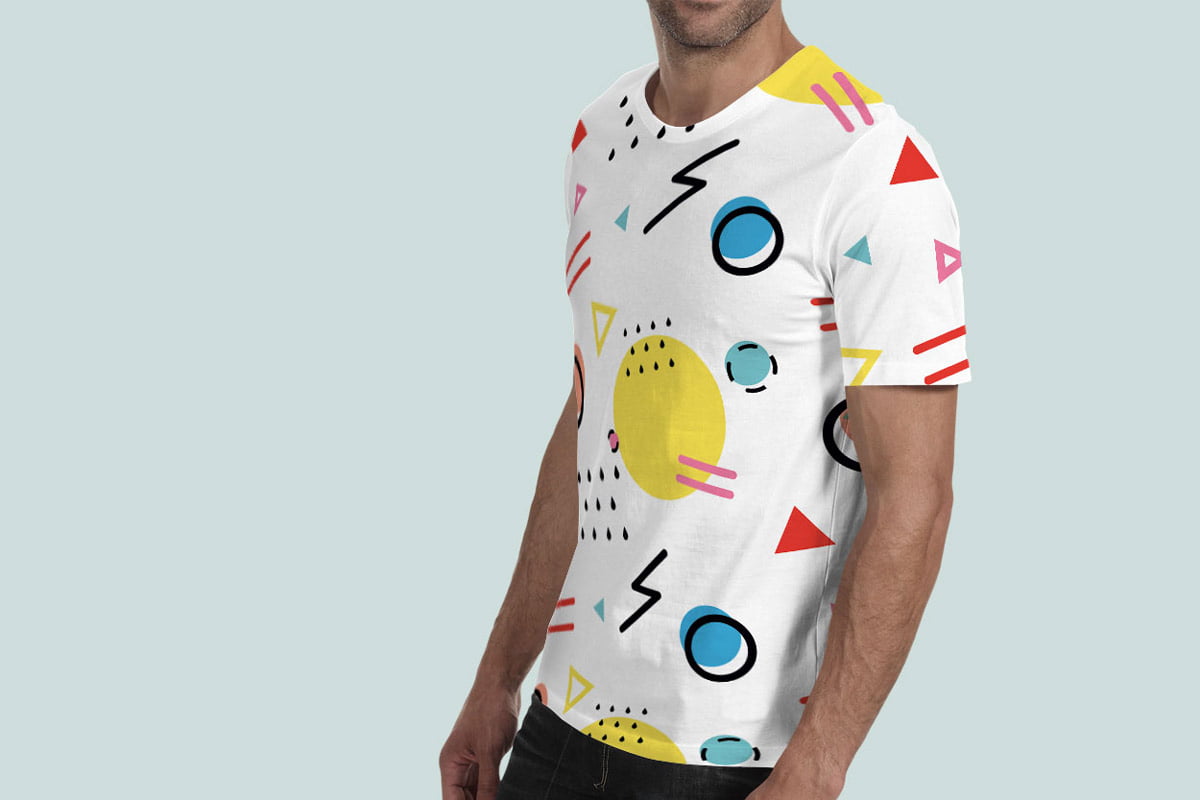
Brighten up your wardrobe with eye-catching, vivid colors! When seeking an apparel upgrade look no further than fabrics made of 100% polyester – they’ll guarantee a perfect dye sublimation.

When printing on fabrics, poly-cotton blends make for a great base. However, keep in mind that the dye will only bond to the polyester – with lower percentages creating faded transfer prints. Despite this being an issue during production, it can actually result in vintage-style designs which look amazing! For optimal color payoff I recommend 60% or above when working with these materials – although many are content at 40%.
Other Sublimation Craft Blanks
Sublimation is a special printing method that uses special sublimation inks and special heat-resistant sublimation blanks to create vibrant, full-color transfers onto items like cups, hats, and fabric. In addition to the more conventional sublimation blanks such as mugs, masks, and t-shirts, there are a plethora of other items you can sublimate on from tumblers and coasters to ornaments, earrings, keychains – even wood!
To make sure you don’t waste special inks on the wrong kind of blank item, it’s important to look for products that say they are specifically “ready for sublimation”. Special Epson Eco tank printers along with special sublimation paper then makes it easy to produce quality designs that last. With so many possibilities available via sublimation – now’s the time to get creative
Sublimation offers a fun, easy way to personalize products that is suitable for any budget. To begin sublimating onto items, special sublimation ink is necessary as well as an epson eco tank printer or sublimation specific printer. Sublimation blanks are easily accessible and not overly expensive, with most costing about the same price as regular craft blanks. The special coating needed for the special sublimation ink to bond to can easily be found on sublimation blanks online.
If you’re looking for something slightly more unique, you may choose to utilize acrylics or rayons without needing to use special coatings at all! Sublimation continues to be a popular crafting trend for many – have fun exploring all of your options
Convert Epson Printer to Sublimation
Ready to get the sublimation process rolling? Let’s set up your Epson printer so we can make it happen! There’s no complex conversion required – just load the ink tanks with specialized dye-sublimation ink and you’re good to go. So let’s start crafting vibrant, one-of-a kind designs that will truly stand out.
With the straightforward instructions, I was quickly and effortlessly connected to my computer. Then in just a few minutes, it was time for me to get started on filling up my printer with Hiipoo Ink! It couldn’t have been easier – no wonder this is one of the most popular printers around.
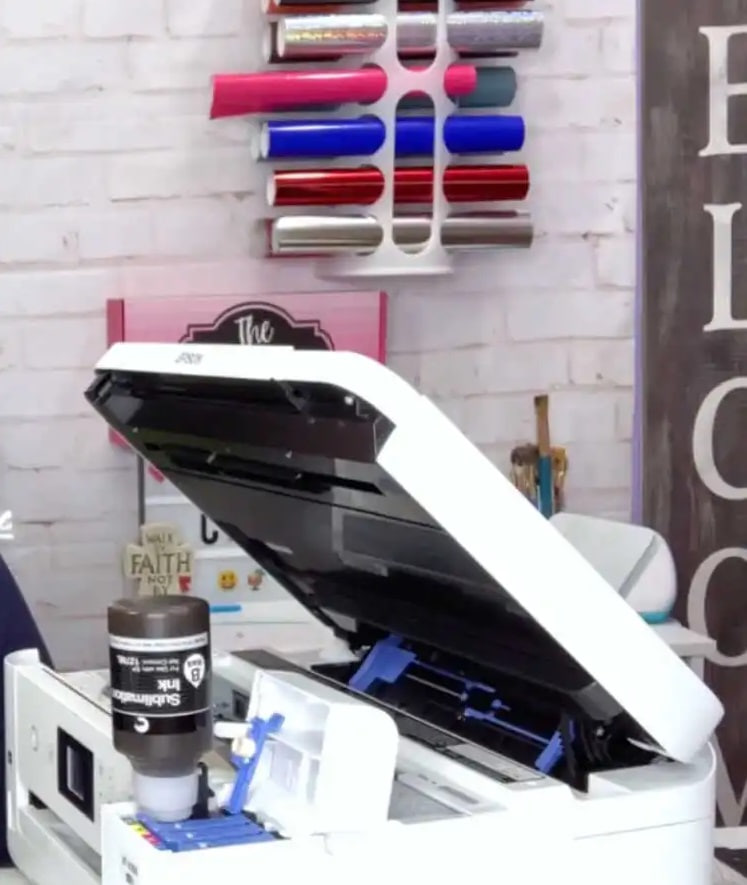
Fill Epson Printer with Sublimation Ink
Unlock the top of your printer and behold – a sight that can only be described as an ink paradise. Uncover each hue with its own blue tab, exposing a fill port in anticipation for what lies ahead. Pop open the non-spill Hiipoo Sublimation Ink bottle and give it a shake – no mess provided! For this is not like any other liquid; you shall remain spotless after all is said and done.
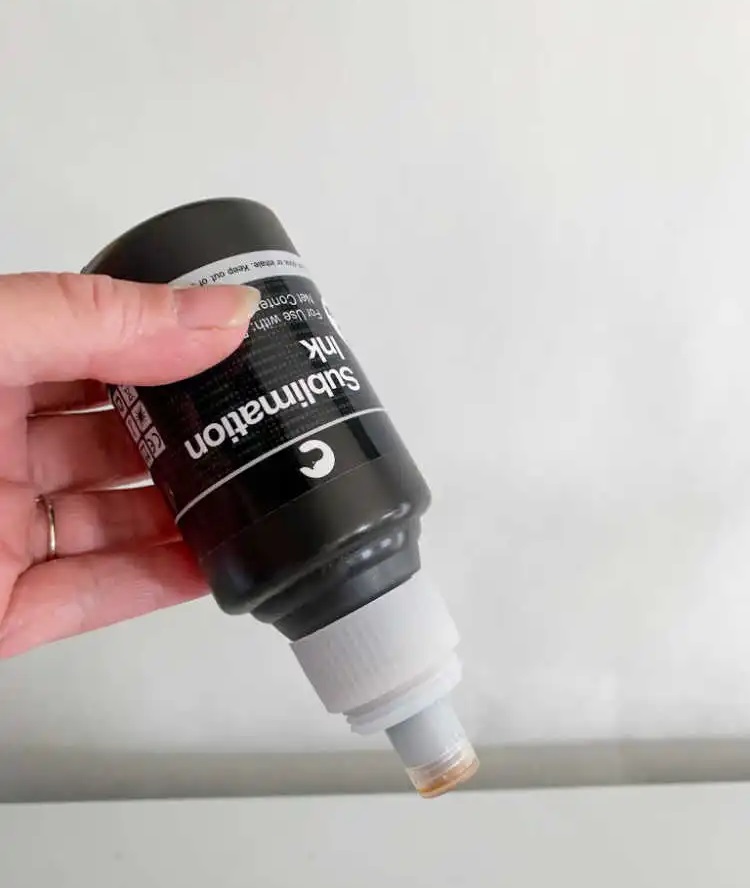
To get your Epson printer up and running, properly fit the ink bottle onto its matching color tank. Then gently press down to make sure it has click-locked into place – you may need to raise all of the open ports for a snugger fit first.
Replenish your sublimation ink with a simple tap – no squeezing required! Let the power of gravity do its work and quickly move color to color by simply removing emptied bottles. If that doesn’t immediately get things flowing, try opening all ports before making another attempt; it might take several attempts for success.
When your new ink cartridge is installed and ready to go, Epson will do the heavy lifting of preparing the printer for you! Easily follow along with a few quick steps outlined in either instructions that come with your purchase or onscreen prompts – all it takes is 10 minutes from start to finish.
Make the most of your wait time and get a jump start on printing! While the printer is occupied, use it as an opportunity to install software so you’ll be all set when it’s finished. By following simple prompts, you can maximize efficiency and have everything ready for optimal output in no time.
Where to Find Sublimation Images
With so many options, finding the perfect design for your sublimation project can be overwhelming – but not anymore! We’ve created a library of amazing SVG files and designs that you’ll have access to instantly. Get creative and enjoy having an entire world of possibilities right at your fingertips.
Ready to turn your crafting up a notch? Check out Design Bundles and Etsy for amazing Sublimation designs! All you need is the keyword “sublimation” in the search bar, then check under PNG images for picture-perfect prints. We’ll give all the details on how to use Cricut Design Space with sublimations during our upcoming video – so don’t miss it!
How to Print Sublimation Images
With your design in hand, you’re ready for printing! You have the option to use Cricut Design Space but be aware that it will add black outlines around your artwork. Consider other printing options to achieve a more customized look.
We can cut the lines off, no problem. But it is a waste of ink.
Bring your creative idea to life with just a few clicks. Download the design and open it on your computer – simply double-click or right-click as desired. Now you can print out that vision, no fuss.
Mirror Your Design
With the latest advancements in technology, it’s easy to turn any design into a stunning mirror image. All you have to do is open up your computer and flip horizontally through the tools menu — magic.
If your computer isn’t cooperating, don’t worry! You can easily mirror and print an image in no time with Design Space.
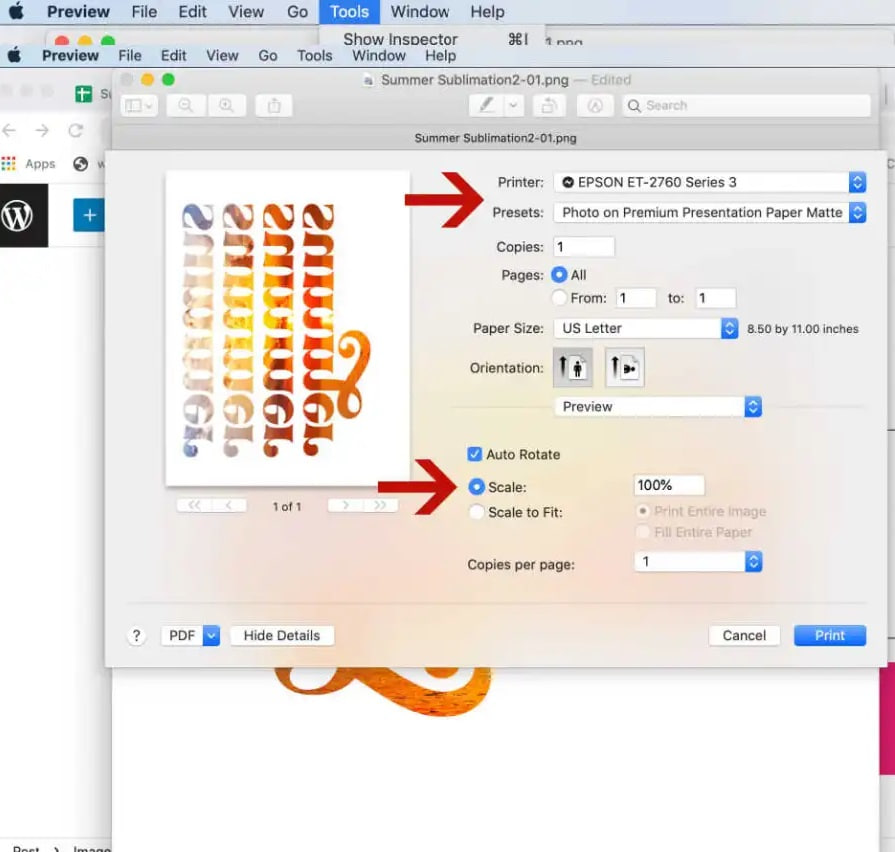
Printer Settings for Sublimation
Once you are satisfied with the design, it’s time to get printing! Head over to File and hit Print: that will bring up your Printing Menu. With a few clicks of the mouse, select an Epson printer for best results – make sure those settings include Photo on Matte Paper as well; at 100% scale size for optimal sizing (which is normally pre-set by our amazing designers).
Load the Sublimation Paper into the Epson Printer
When using an Epson EcoTank 2760 to print, make sure the printed side of the Hiipoo Sublimation Paper is facing upwards; it has a helpful watermark so you can tell which side that is.
Unlock your printer’s hidden potential – simply pull up the grey paper rest and move out the green guides. Placing it print-side-up in the slot, make sure to nudge those resilient papers back into place with adjustable guides for best results.
Give your design an eye-popping makeover with sublimation! The colors on the final product will be significantly brighter and more vivid than when printed – provided you use the right materials for transferring. A dull image can now become a vibrant masterpiece in no time at all.
Preparing Your Blanks for Sublimation
Get your sublimation blanks ready to turn into a work of art! Pre-heating fabric such as t-shirts and totes will help remove moisture, so once your heat press is hot make sure you give the material 5 to 10 seconds – but don’t forget to let it cool before transfering.
As your material cools off, grab that lint roller and give it a go! You might be surprised by the amount of fuzz and debris trapped in its fibers – even if you don’t think anything’s there. Give yourself peace of mind with this simple cleaning step.

For a pristine look, you’ll want to prep hard surfaces like wood, metal and ceramic tiles with an alcohol wipe or cleanser. To rid them of dust particles, lint rollers can get the job done quickly while microfiber cloths provide a gentler touch.
Heat Press Settings for Sublimation
When it comes to sublimation, the temperature of your heat press is more than just a number. Not only does each machine differ in how hot it gets when set at certain temperatures—a variation could be as much as two degrees! As such, understanding these nuances can make all the difference for beautiful end results.
When printing on a blank, you must consider the material and what temperature settings it requires. A wide range of times is usually recommended – for example, earring blanks require temperatures at 356 degrees with 40-75 second subsets. To ensure successful sublimating without wasting time or materials, begin by testing your results near the midpoint!
For stunning, vibrant colors with your sublimation process you don’t have to go the extreme. A lower temp of 350 degrees can deliver incredible results when pressed for 120-130 seconds – perfect for delicate fabrics such as polyester blends. If time is more pressing than quality however, crank up the heat and press around 50-60 second at 400 degrees to get an outstanding finish quickly.

When finding the perfect temperature and timing for heat pressing t-shirts, my go-to is 385 degrees at 55 seconds. I find that a polyester/cotton blend allows me to feel as comfortable in a shirt as can be – no matter what kind of day or situation it’s used for! Through some trial and error, you’ll discover your own ideal settings so you can press with pleasure every time.
You may also be interested: Can you use sublimation ink for regular printing?
Sublimating a Shirt
After getting all set up for sublimation printing and learning how to properly prepare your shirt, now it’s time to get that design transferred! But not so fast – before you can begin transferring ink onto the fabric of choice make sure a protective layer is placed between. This could be parchment paper or a teflon sheet; either one will help keep any accidental stains off the backside of your creation. Now we’re ready–let’s start sublimating something amazing.

To get your design just right, start by placing the print side down on your shirt. Generally speaking, it should be about two inches below the collar – this is easy to gauge with a v-neck.
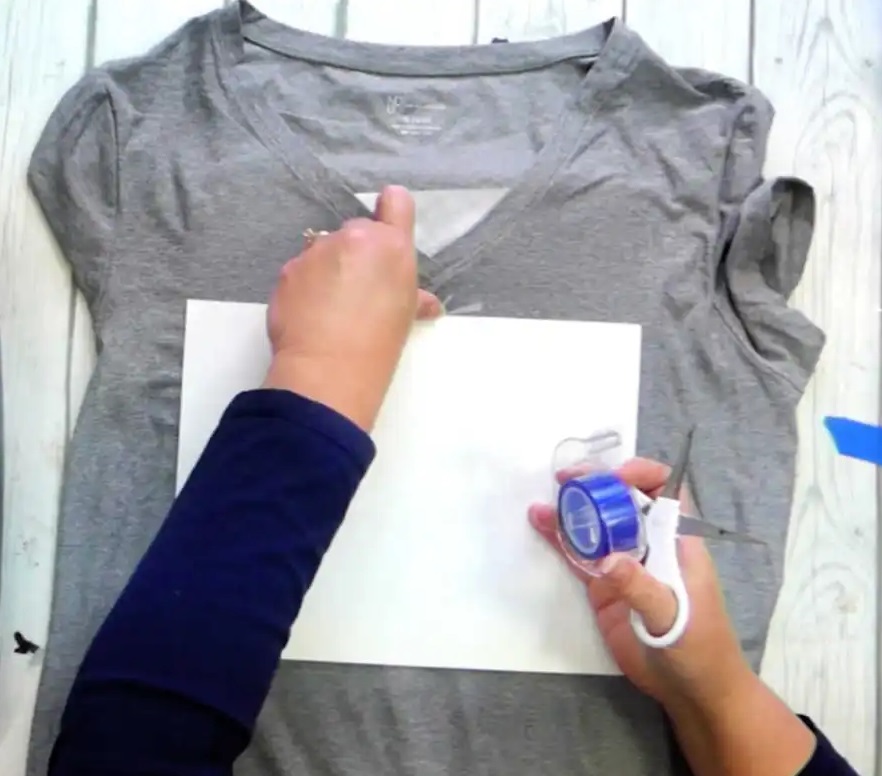
Don’t let your design get off-center! To ensure accuracy, try folding your scoop neck shirt in half and pressing it to create a centerline for precise alignment. Then use heat-resistant tape to secure the paper – it’s an essential step towards preventing movement under pressure which can ruin your apparel look.
To prevent any unexpected surprises, it’s essential to make sure you keep your design safe. Place another sheet of parchment paper or teflon over the top – this will protect against ink ‘off-gassing’, a process where solid sublimation ink is transformed into gas during heat exposure and can cause messes in unwanted places.
You may also be interested: Can you sublimate on 100 cotton?
Heat Press your Shirt
It’s time to give your shirt a professional touch! Depending on the fabric blend, temperatures and times can vary when using a heat press—for shirts of 92% polyester like mine, I suggest 375 degrees for 55 seconds. To get an optimal transfer result with minimal wrinkles or shifts in design you’ll want to use firm pressure while keeping the EasyPress as still as possible throughout.
After the timer counts down, carefully lift your easy press from its base and let it cool before removing your creation. Then you’re free to take off both parchment paper and sublimation paper – revealing what started as an idea now transformed into content that won’t soon be forgotten.
Also read: How to do sublimation with Cricut?
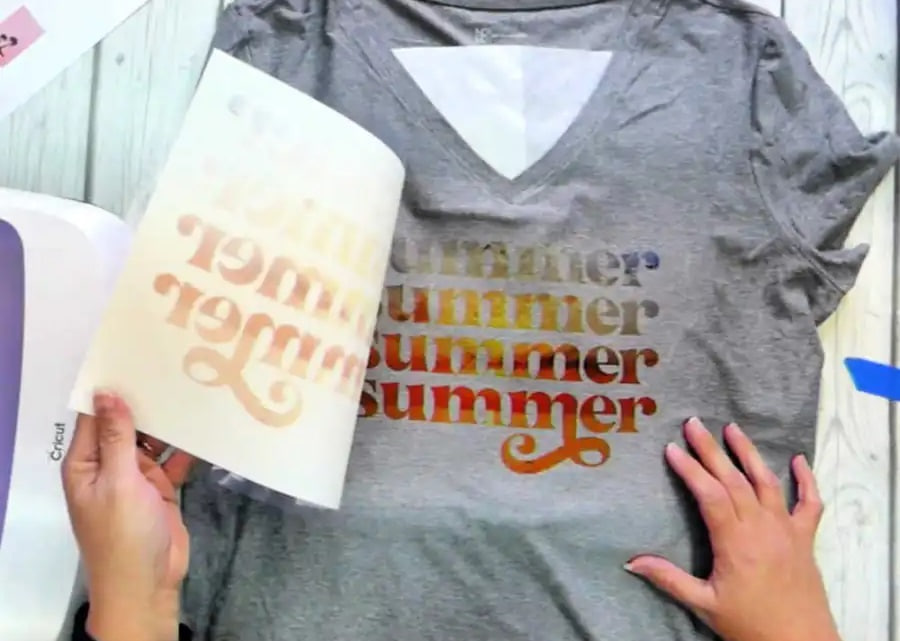
With this shirt, you can experience immediate satisfaction. No need to wait around for the ink to settle – your new look will maintain its vibrancy regardless of how many times it’s washed.
Sublimate Earrings
To create unique and beautiful earrings, start off by prepping your materials for sublimation. Print multiple copies of designs on one sheet to effectively transfer the prints onto both sides of the accessories. Cut out a small portion from each design so you can get down to business and craft with ease! Put parchment paper or Teflon sheets at the bottom before centering and taping down individual pieces – this will help collect any excess gas that could hinder printing quality. Now let’s bring some pizzazz into those plain old hoops.
Read also: Difference between screen printing and sublimation.

For a successful earring press, start by placing the design paper face up on a heat-safe surface. Cover with another sheet of parchment and then carefully apply your heated press for around 55 seconds at 380 degrees – that’s quite high! Once cooled to room temp, gently peel off any tape or excess material from the diamond shape to reveal your completed masterpieces. Voila – ready for admirers’ adoring eyes.
Creating stunning sublimation earrings for yourself or as a gift couldn’t be easier. First, ensure the backside is properly cleaned prior to beginning your project. Then attach all necessary hardware – jump rings securely fit through the earring holes and fish hooks are added with two pairs of needle-nose pliers firmly clamping them together! A few simple steps will have you showing off beautiful designs in no time.
You’ve learned all the basics of sublimation to kickstart your journey. From selecting printers and ink to paper and materials, you’re ready for some amazing projects! Don’t miss out on our FAQs section if there’s something you don’t know already – we promise it’ll be worth it.
Dabbling in sublimation can be daunting for a novice, but fear not–we’ve got you covered! Get ready to learn how to tackle the most common concerns and answer all your questions about this craft.
Also read: Detailed and clear instructions on how to sublimate on wood
How to make Sublimation brighter?
Unsatisfied with the dullness of your sublimation transfers? It could be due to two main reasons. For one, remember that when you print out a design for transfer it should appear much brighter than how it appears on paper – so keep this in mind! Secondly, make sure all materials are correct: 100% polyester fabric and special coating for hard surfaces is key if you want vivid colors. If these steps fail; take note of temperature and time – extra heat or a longer press may do the trick.
Why is Sublimation Black not Black?
Black is the sharpest eye-catcher – and even a small deviation in it will instantly stand out. However, there’s often a tricky balance that needs to be struck: too little heat or time can make black look faded green or blue, while too much of either could create an unfortunate grayish hue or brown tint instead! Adjusting settings appropriately is key for achieving perfect ebony results every time.
Why are there spots in my Sublimation Colors?
Transfer mishaps can be caused by a variety of reasons, such as excessive moisture in the fabric or small fibers and fingerprints on your blanks. To achieve perfect results every time it is important to pre-heat materials before sublimating, then let them cool once done; and make sure all surfaces are clean from dirt particles with lint rollers or microfiber cloths for seamless graphics transfers.
Read also: What is the best shirt for sublimation?
Why is my Sublimation Ink Bleeding?
Ghosting in your sublimation ink can ruin any project, but don’t fear! To make sure this doesn’t happen to you and your creations, use heat-resistant tape while transferring with an EasyPress. For best results when it comes time to remove the transfer from the blank be patient – never rush a good thing by moving or lifting off quickly as that could cause ghosting issues. Taking proper precautions will help ensure smooth sailing for all of crafty endeavors.
Why is my Sublimation Blurry?
If your sublimation prints are coming out blurry, don’t fret – it could just be ink ghosting or an issue with the image quality. Make sure to use a PNG image at 300dpi and set the printer’s print quality setting to photo (or better) on matte paper for optimal results. If that still doesn’t work, try lowering your heat press settings until you get the desired outcome.
Read more: Sublimation wide format printer

Hi, I’m artist and sublimation printing expert. Born and raised in Anchorage, Alaska, I had passion for photography and painting from my childhood. I started my career as a sublimation print operator for a local printing company in 2012. The role exposed gave me lots of practical knowledge about printing process, from managing color profiles to ensuring print quality on various materials.
Leave a Reply to Haircuts Cancel reply